DIY Guide: How to Build & Install Your Own B22 Lampu Raya
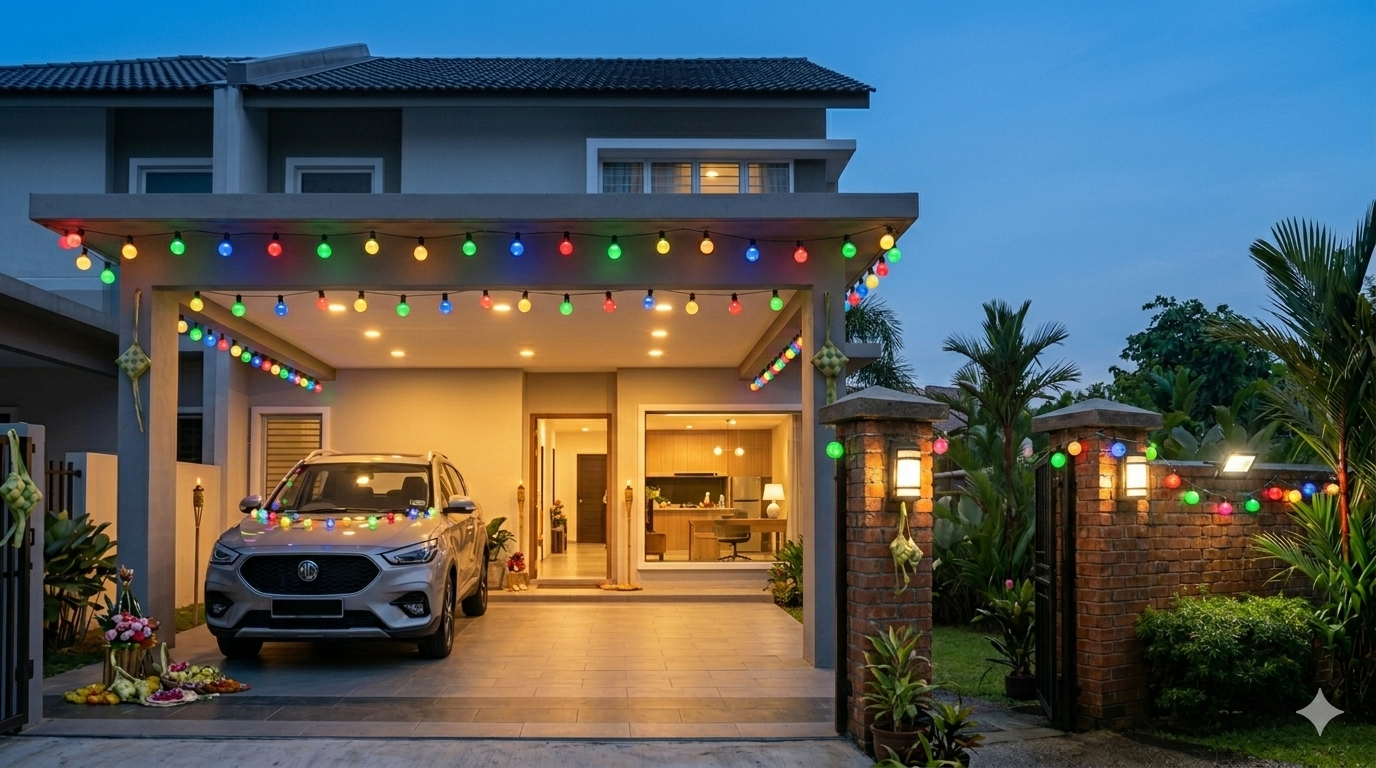
We’ve all been there: you buy a pre-packed set of Raya lights, get home, and realize it’s 2 meters too short to reach around your car porch ceiling. Or even worse, the bulbs are spaced so far apart that the house looks "empty."
Building your ownB22 Bulb Rayasetup is actually easier than you thought! As you saw in our latesttutorial video, there isno wire cutting required.The wedge holders lets you pierce the wire and make a connection instantly.
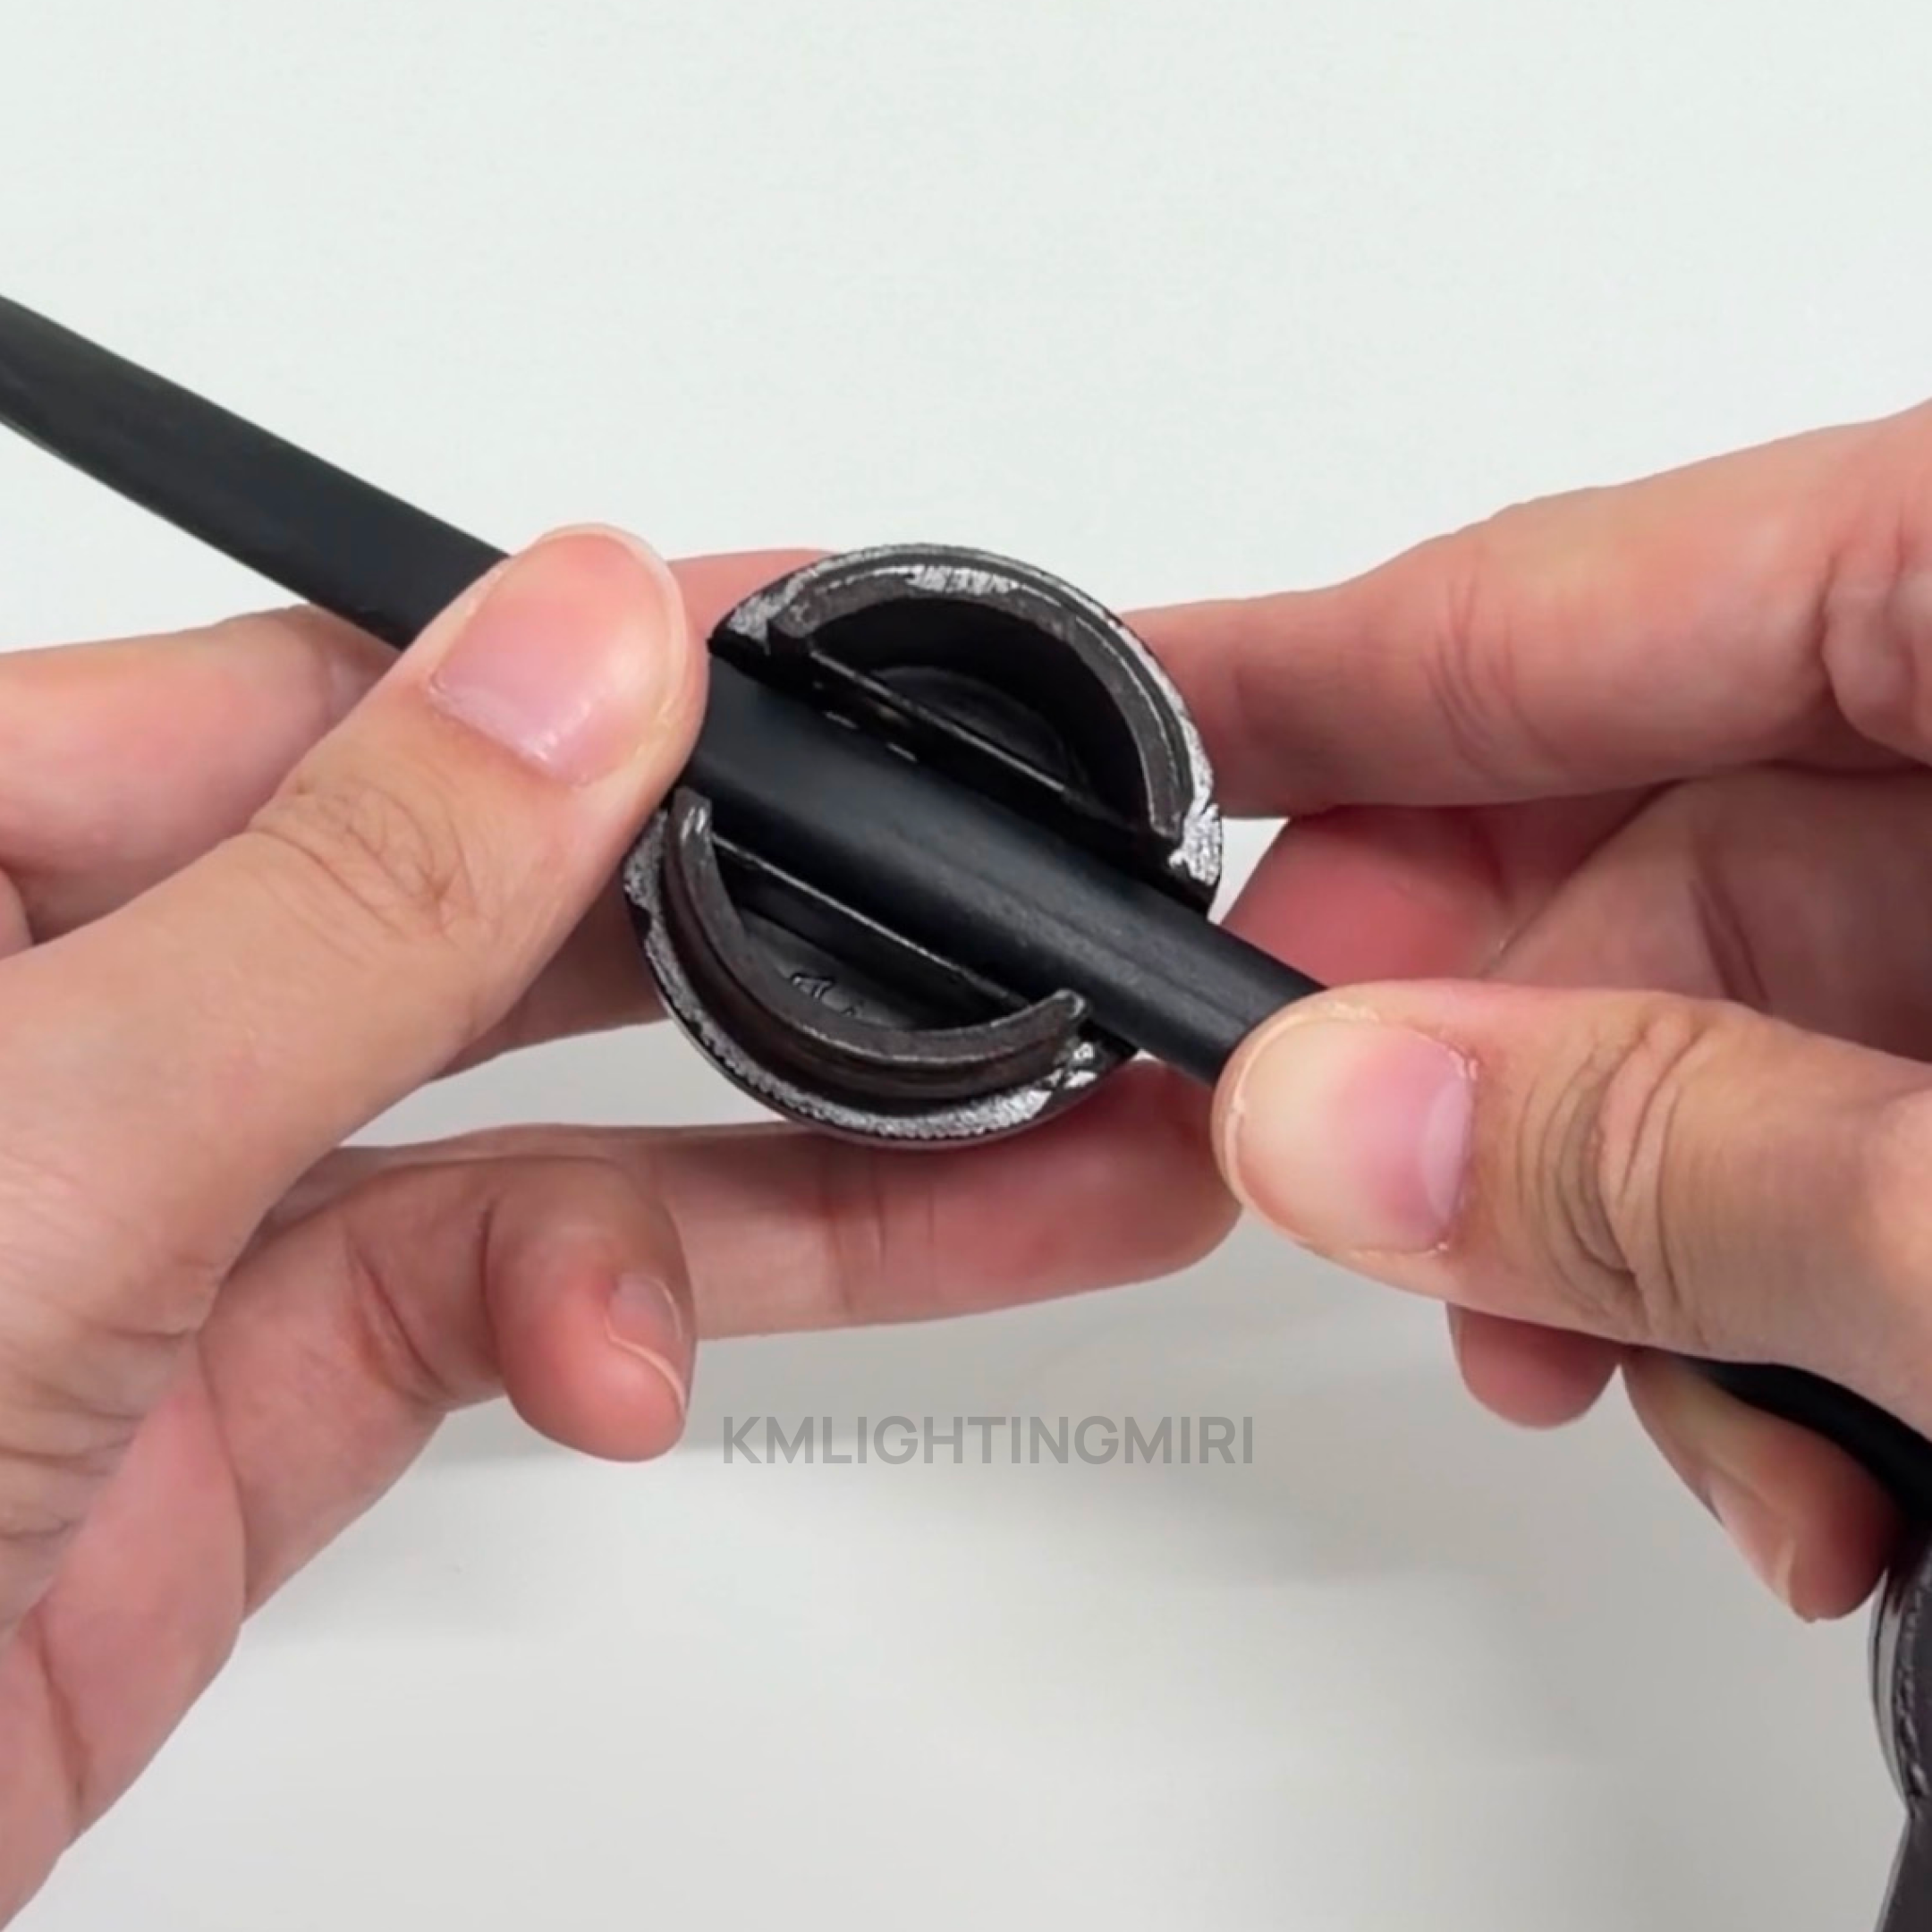
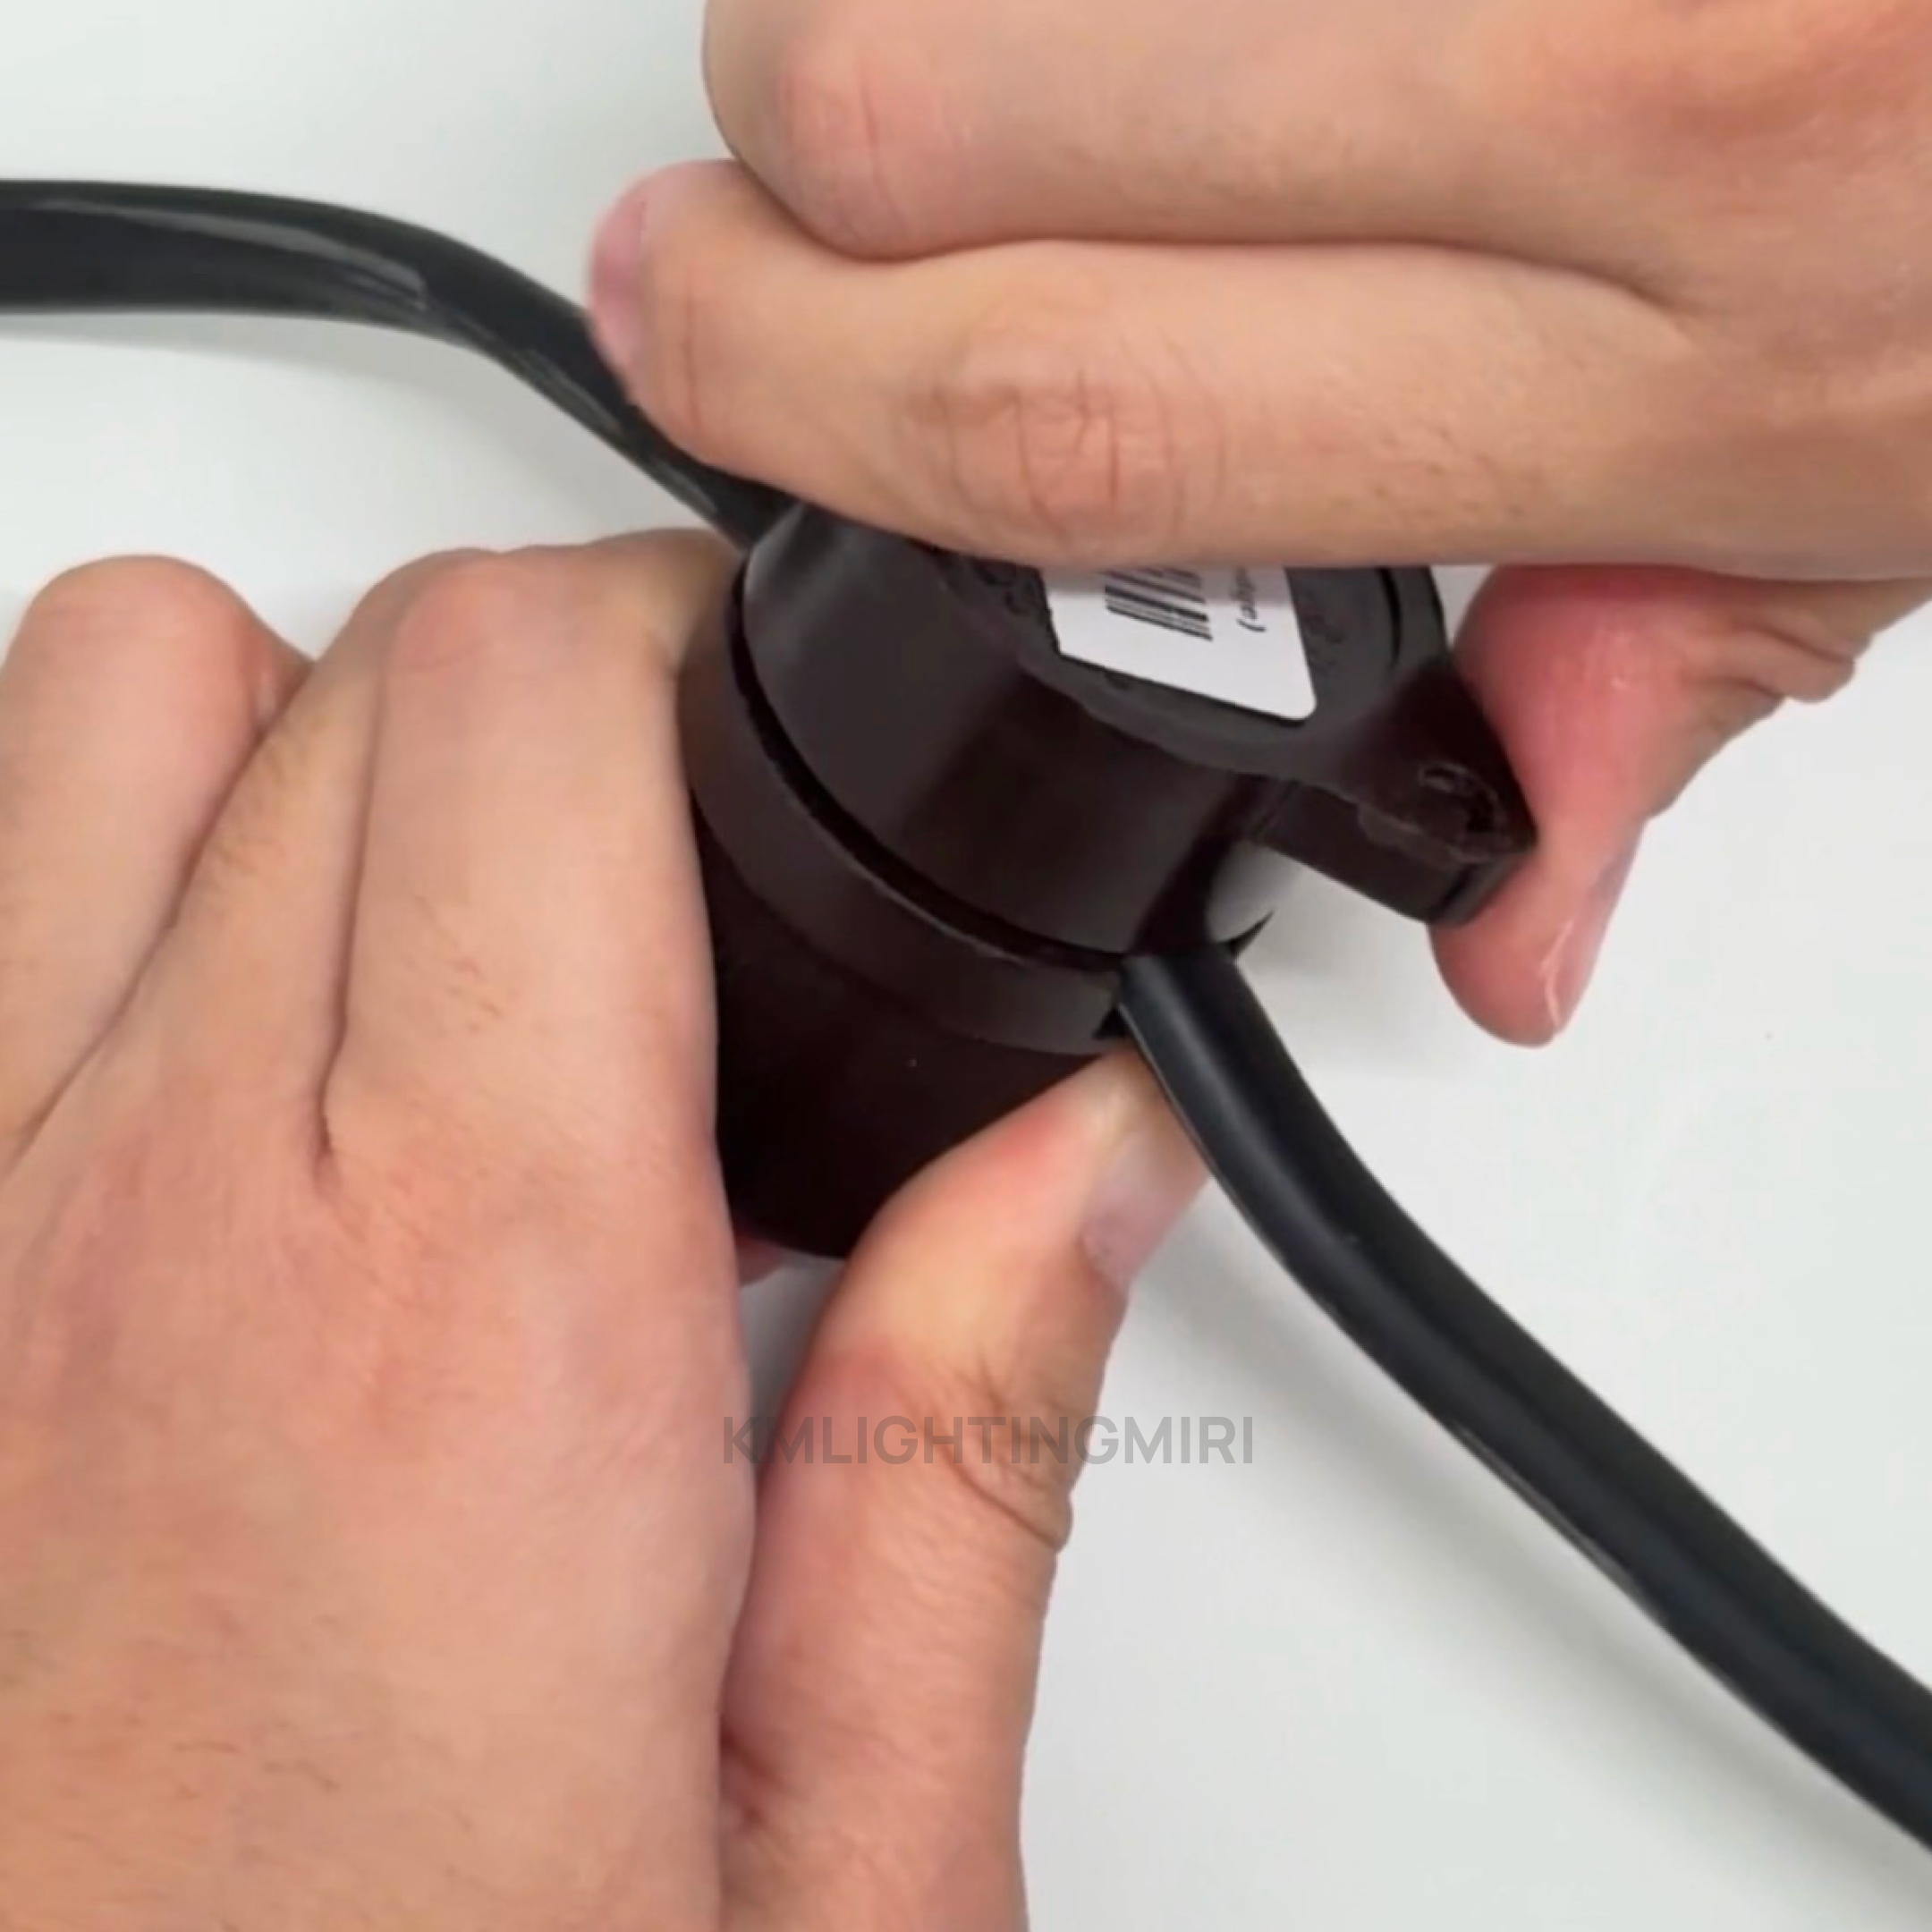
By going DIY, you get the freedom to customize your own length and bulb spacing to fit your house perfectly, all while being more budget-friendly!Materials that you will need:B22 Pin Type Raya BulbsB22 Wedge Holders (Bulb Holders)Twin Flat Wire 2 Core3-Pin Plug TopPVC Electrical TapeCable Clips / Cable Tie📏 Pro Tip: Measure Before You BuyBefore purchasing the cables,measure the distance from your power outlet (plug point) to the very end of the locationwhere you want the lights to stop.Expert Advice:Always buy2–3 meter smore wire than you think you need. This slack ensures you aren't pulling the wire too tight near the plug, which is a common cause of electrical failure!1. Wiring the 3-Pin PlugOpen your3-Pin Plug Topand loosen the terminal screws.Strip a small amount of insulation from one end of theTwin Flat Cableto reveal the copper.Insert the wires into theLive (L)andNeutral (N)terminals (since it’s a 2-core wire, there will be no Earth wire).Tighten the screws firmly and secure the cable grip so the wire doesn't pull out. 2. Plan Your SpacingLay your wire out. Decide how far apart you want your bulbs. We usually recommend30cm to 50cmfor a full, bright look. Mark the spots on the wire.3. Snap on the Wedge HoldersOpen the cover of the bulb holder. Place the wire into the holder slot right on top of the sharp pins. Put the back cover on tight. The internal pins will pierce through the wire to make the connection as you turn the cover tight.
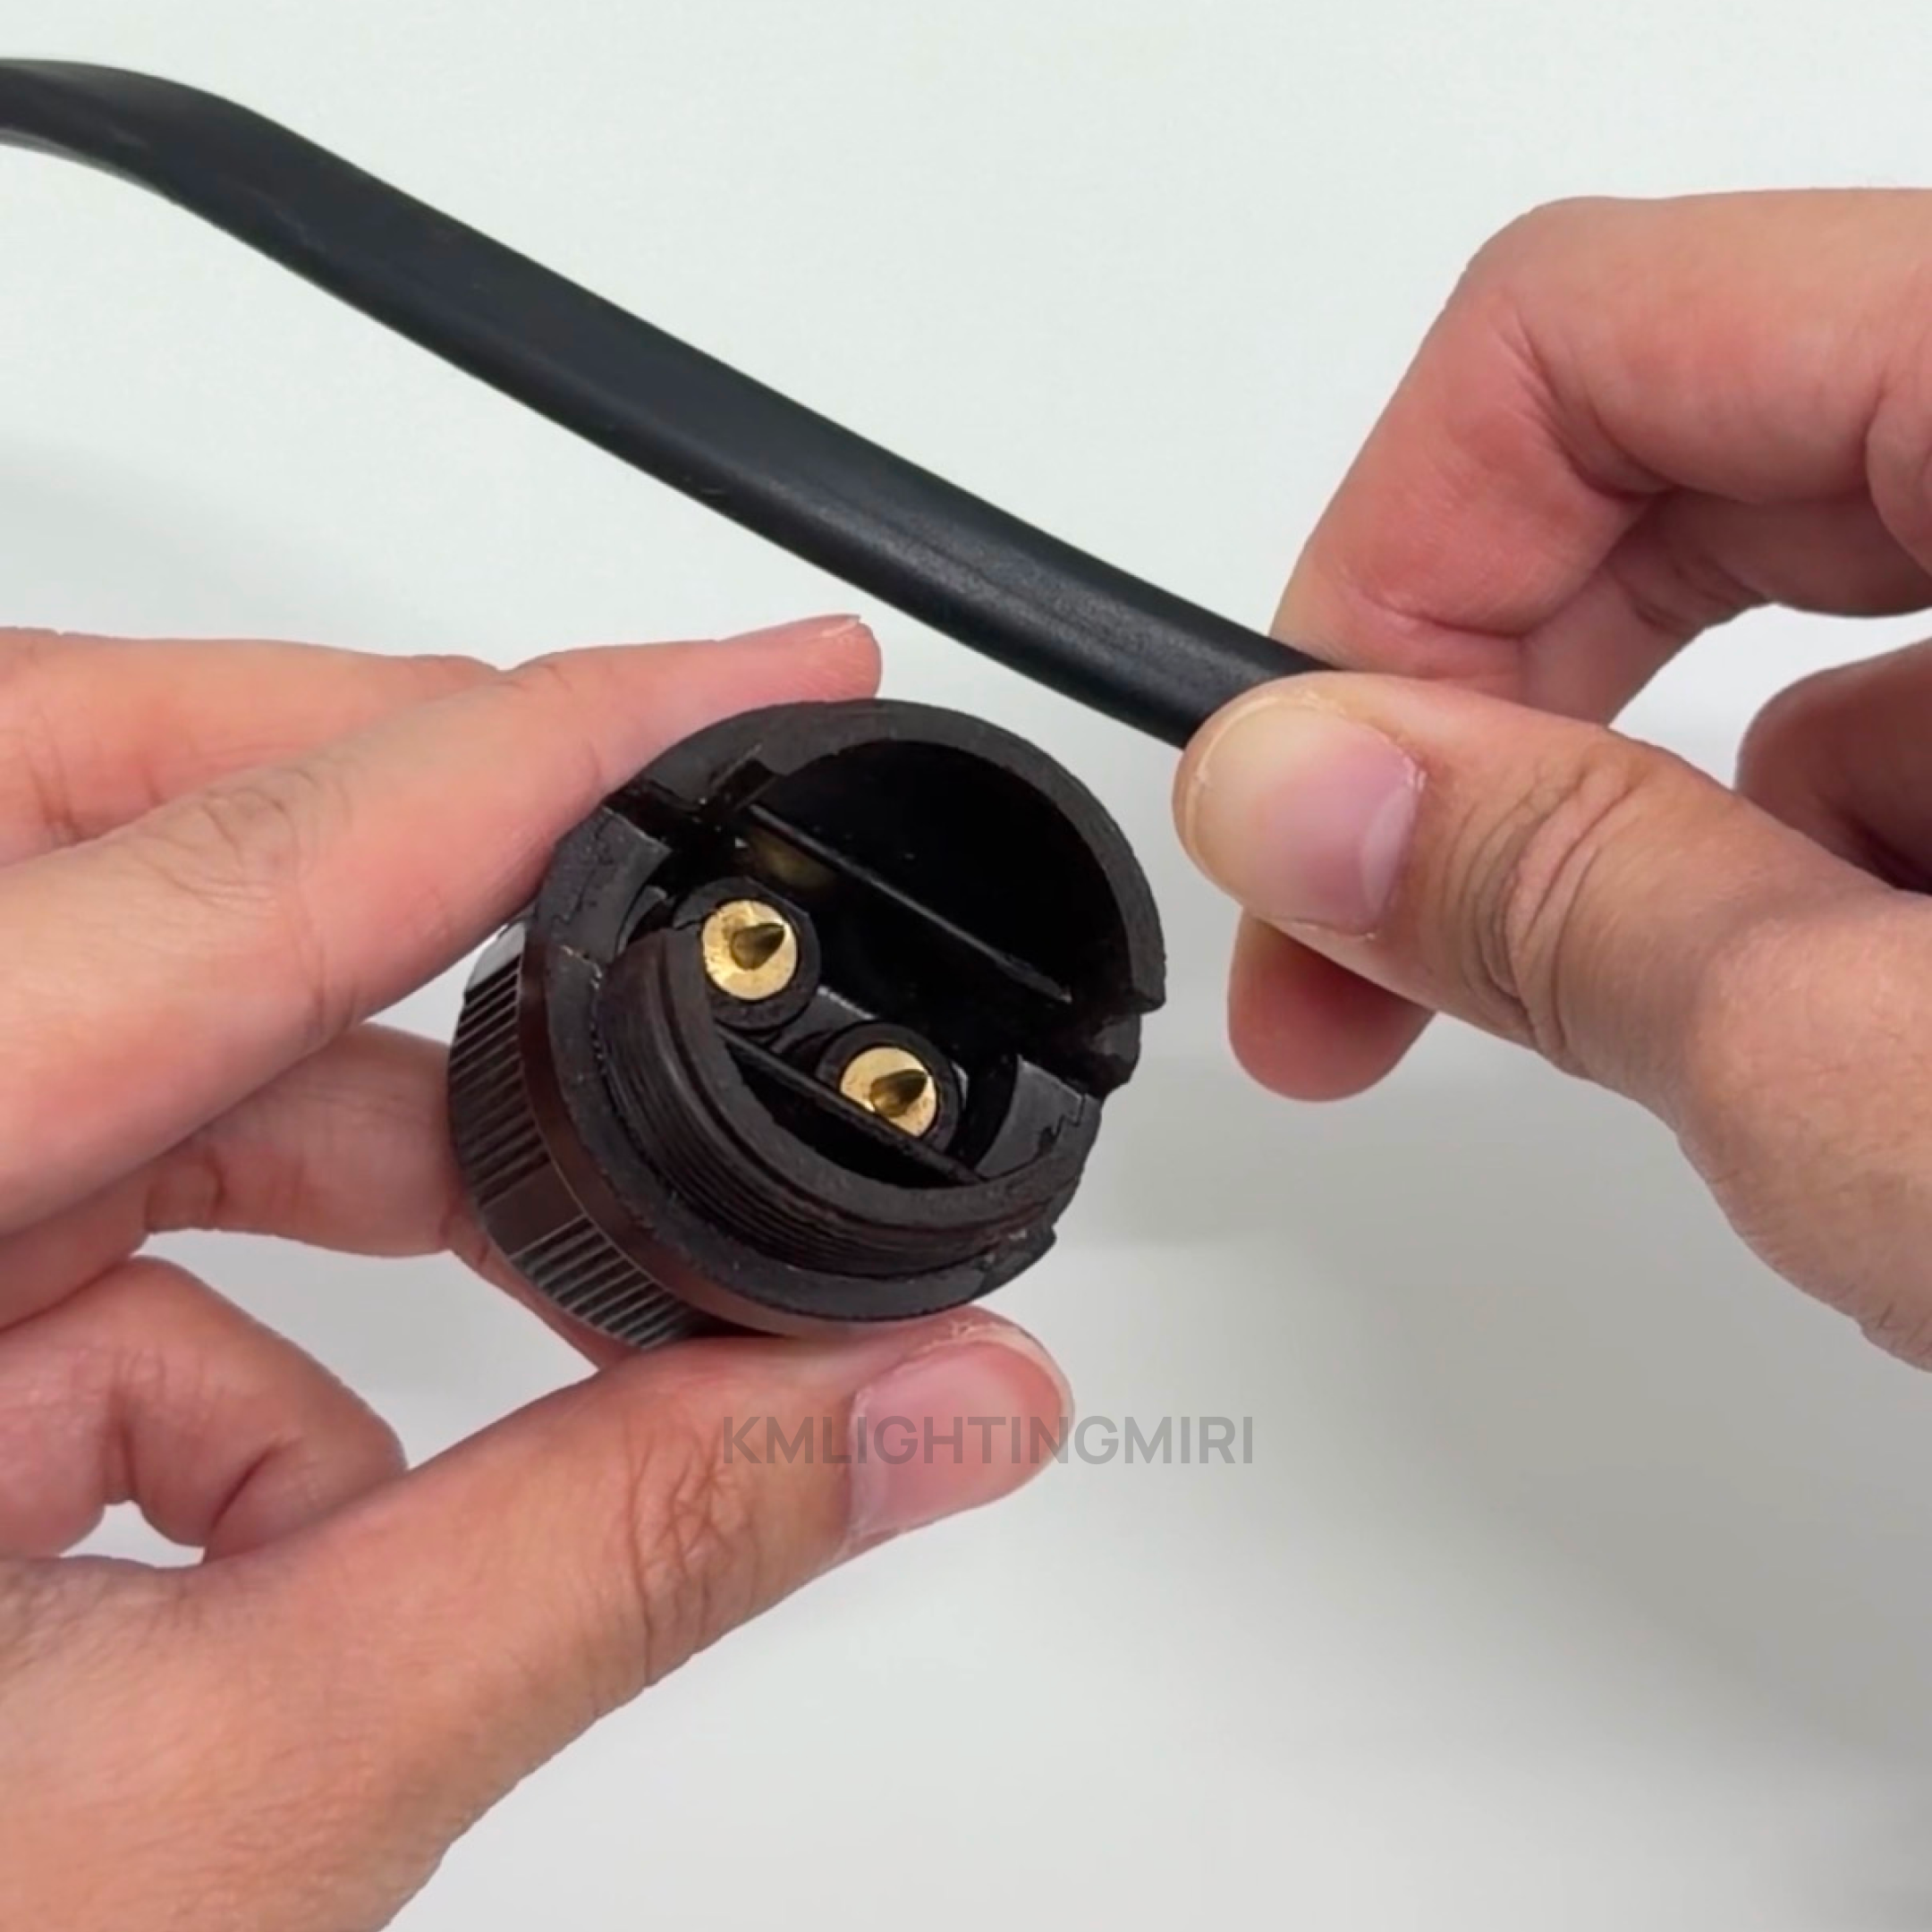
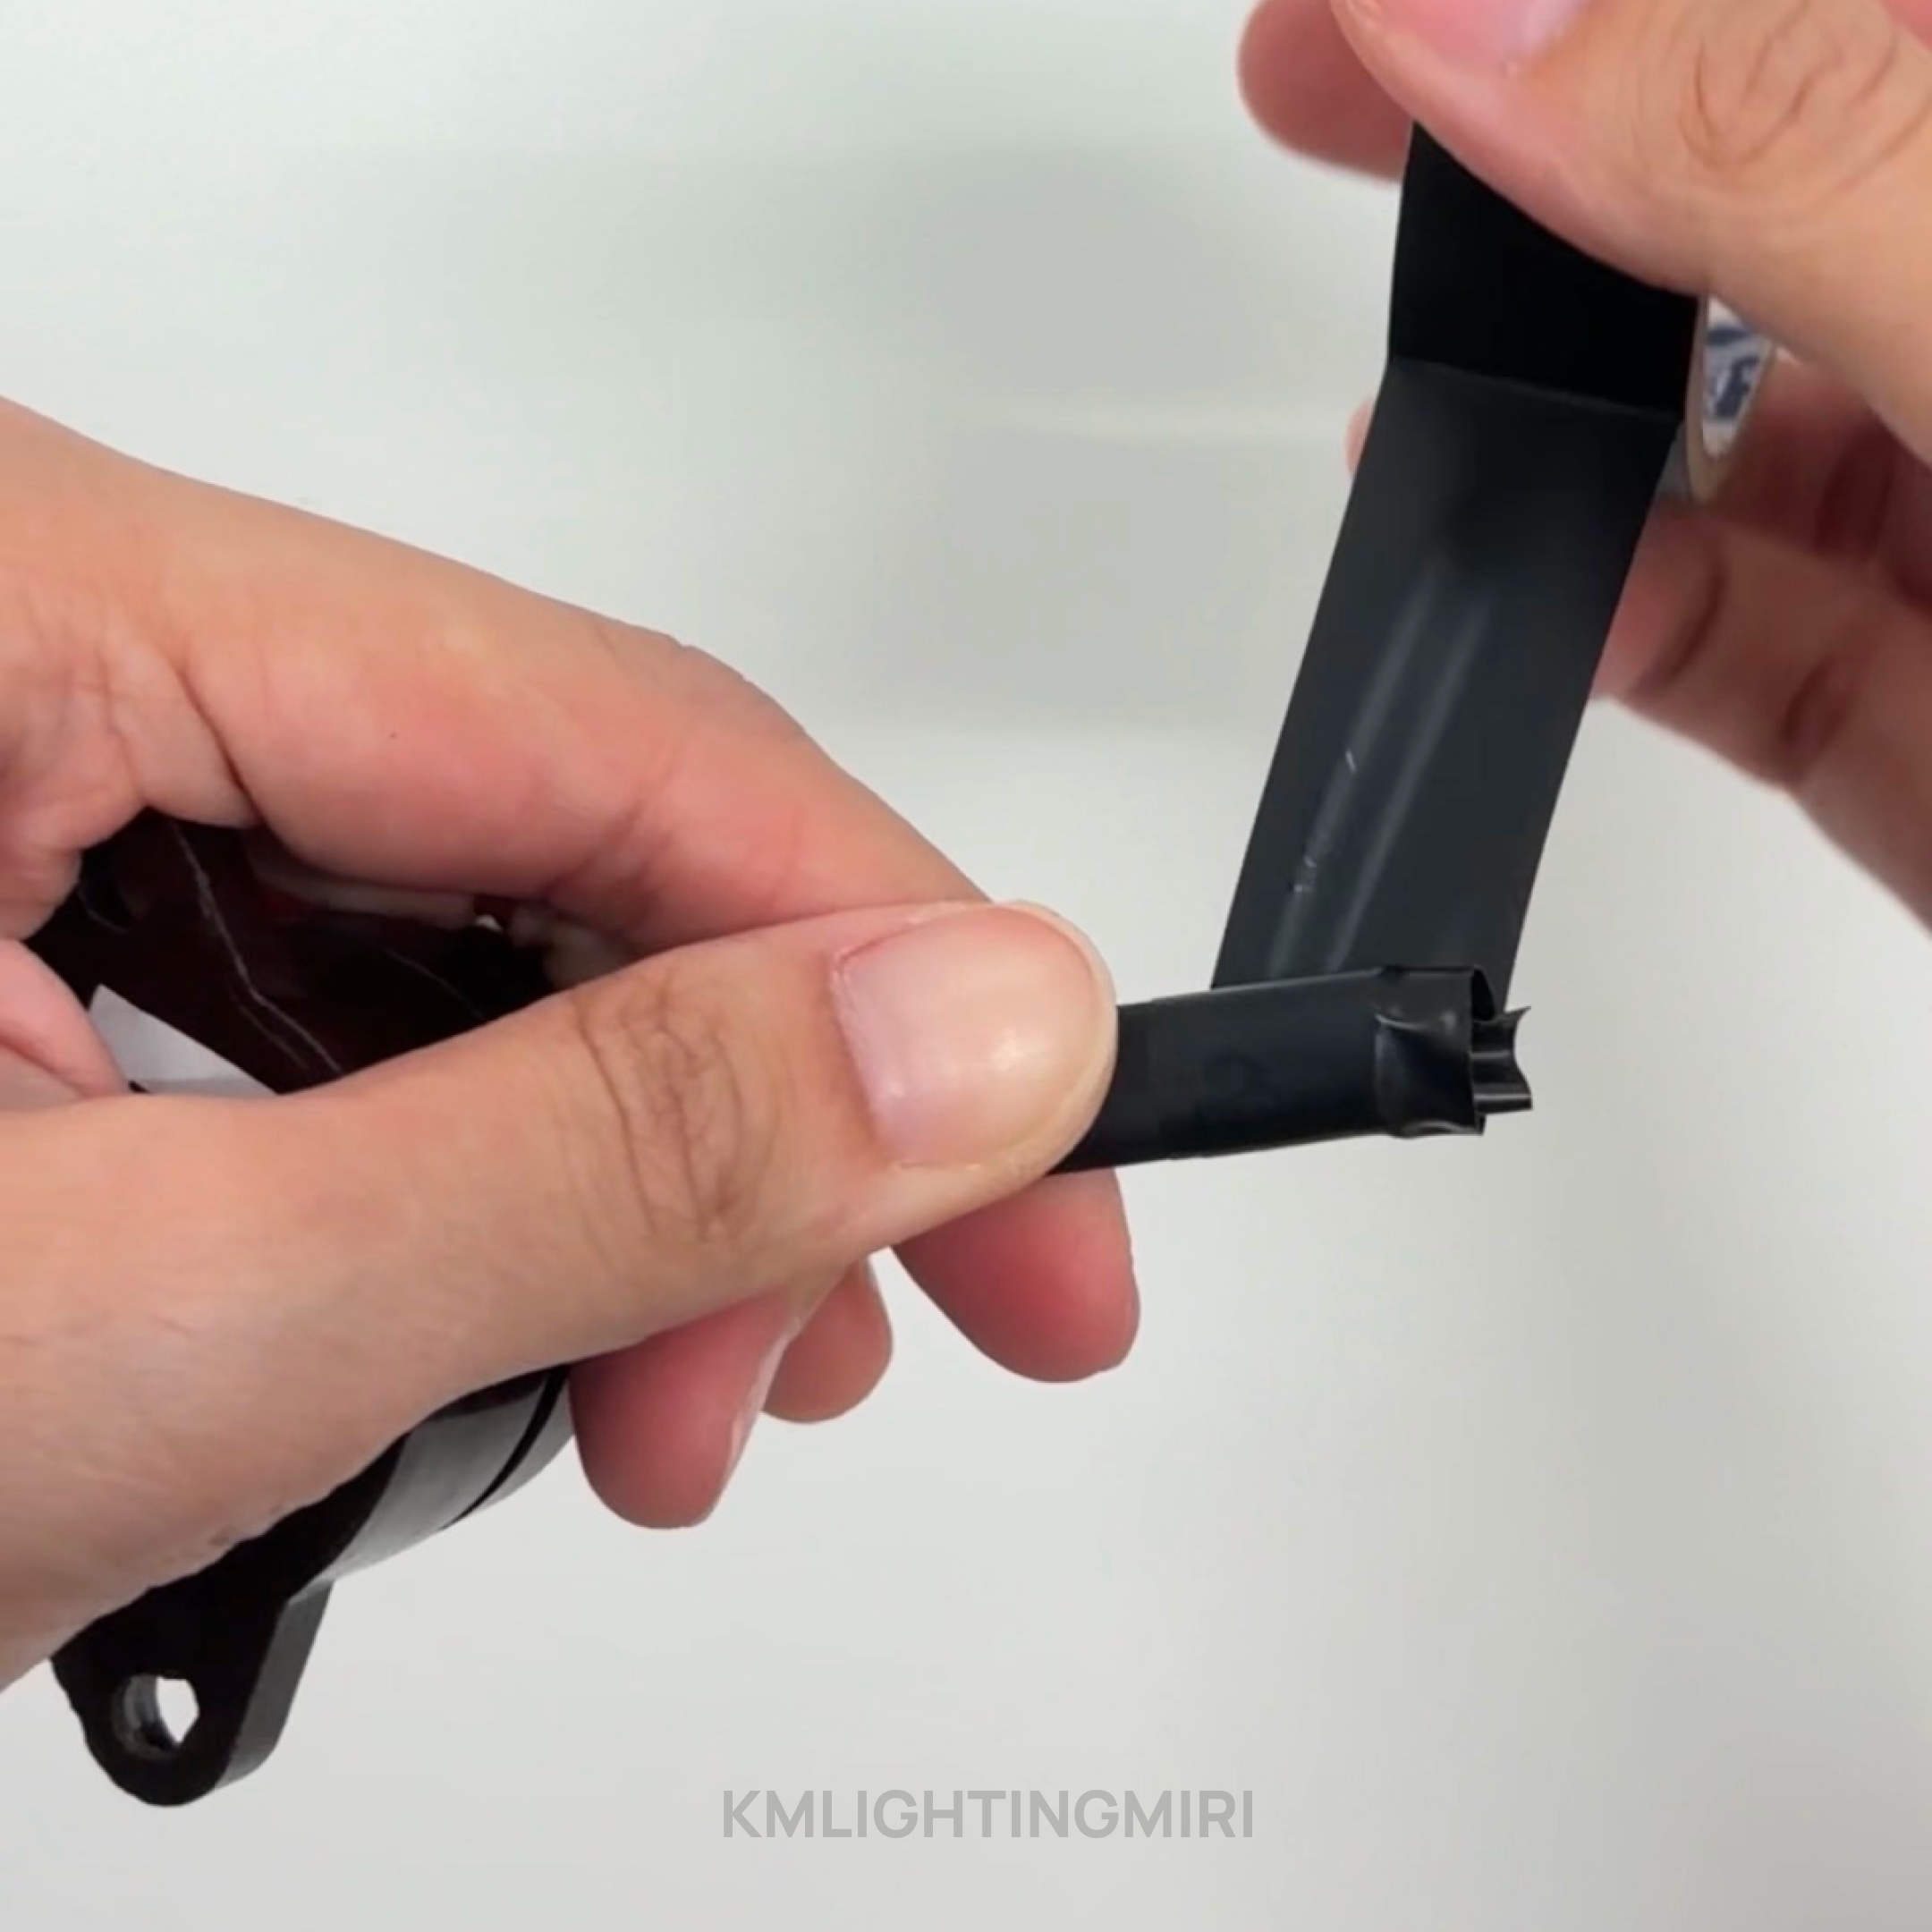
 4. Seal the End (Safety First!)At the very end of your wire, the part furthest from the plug, you’ll have raw wire ends.Wrap this tightly with PVC Electrical Tape.Wrap it several times so no copper is showing and moisture can't get in. This is the most important step for a safe setup!
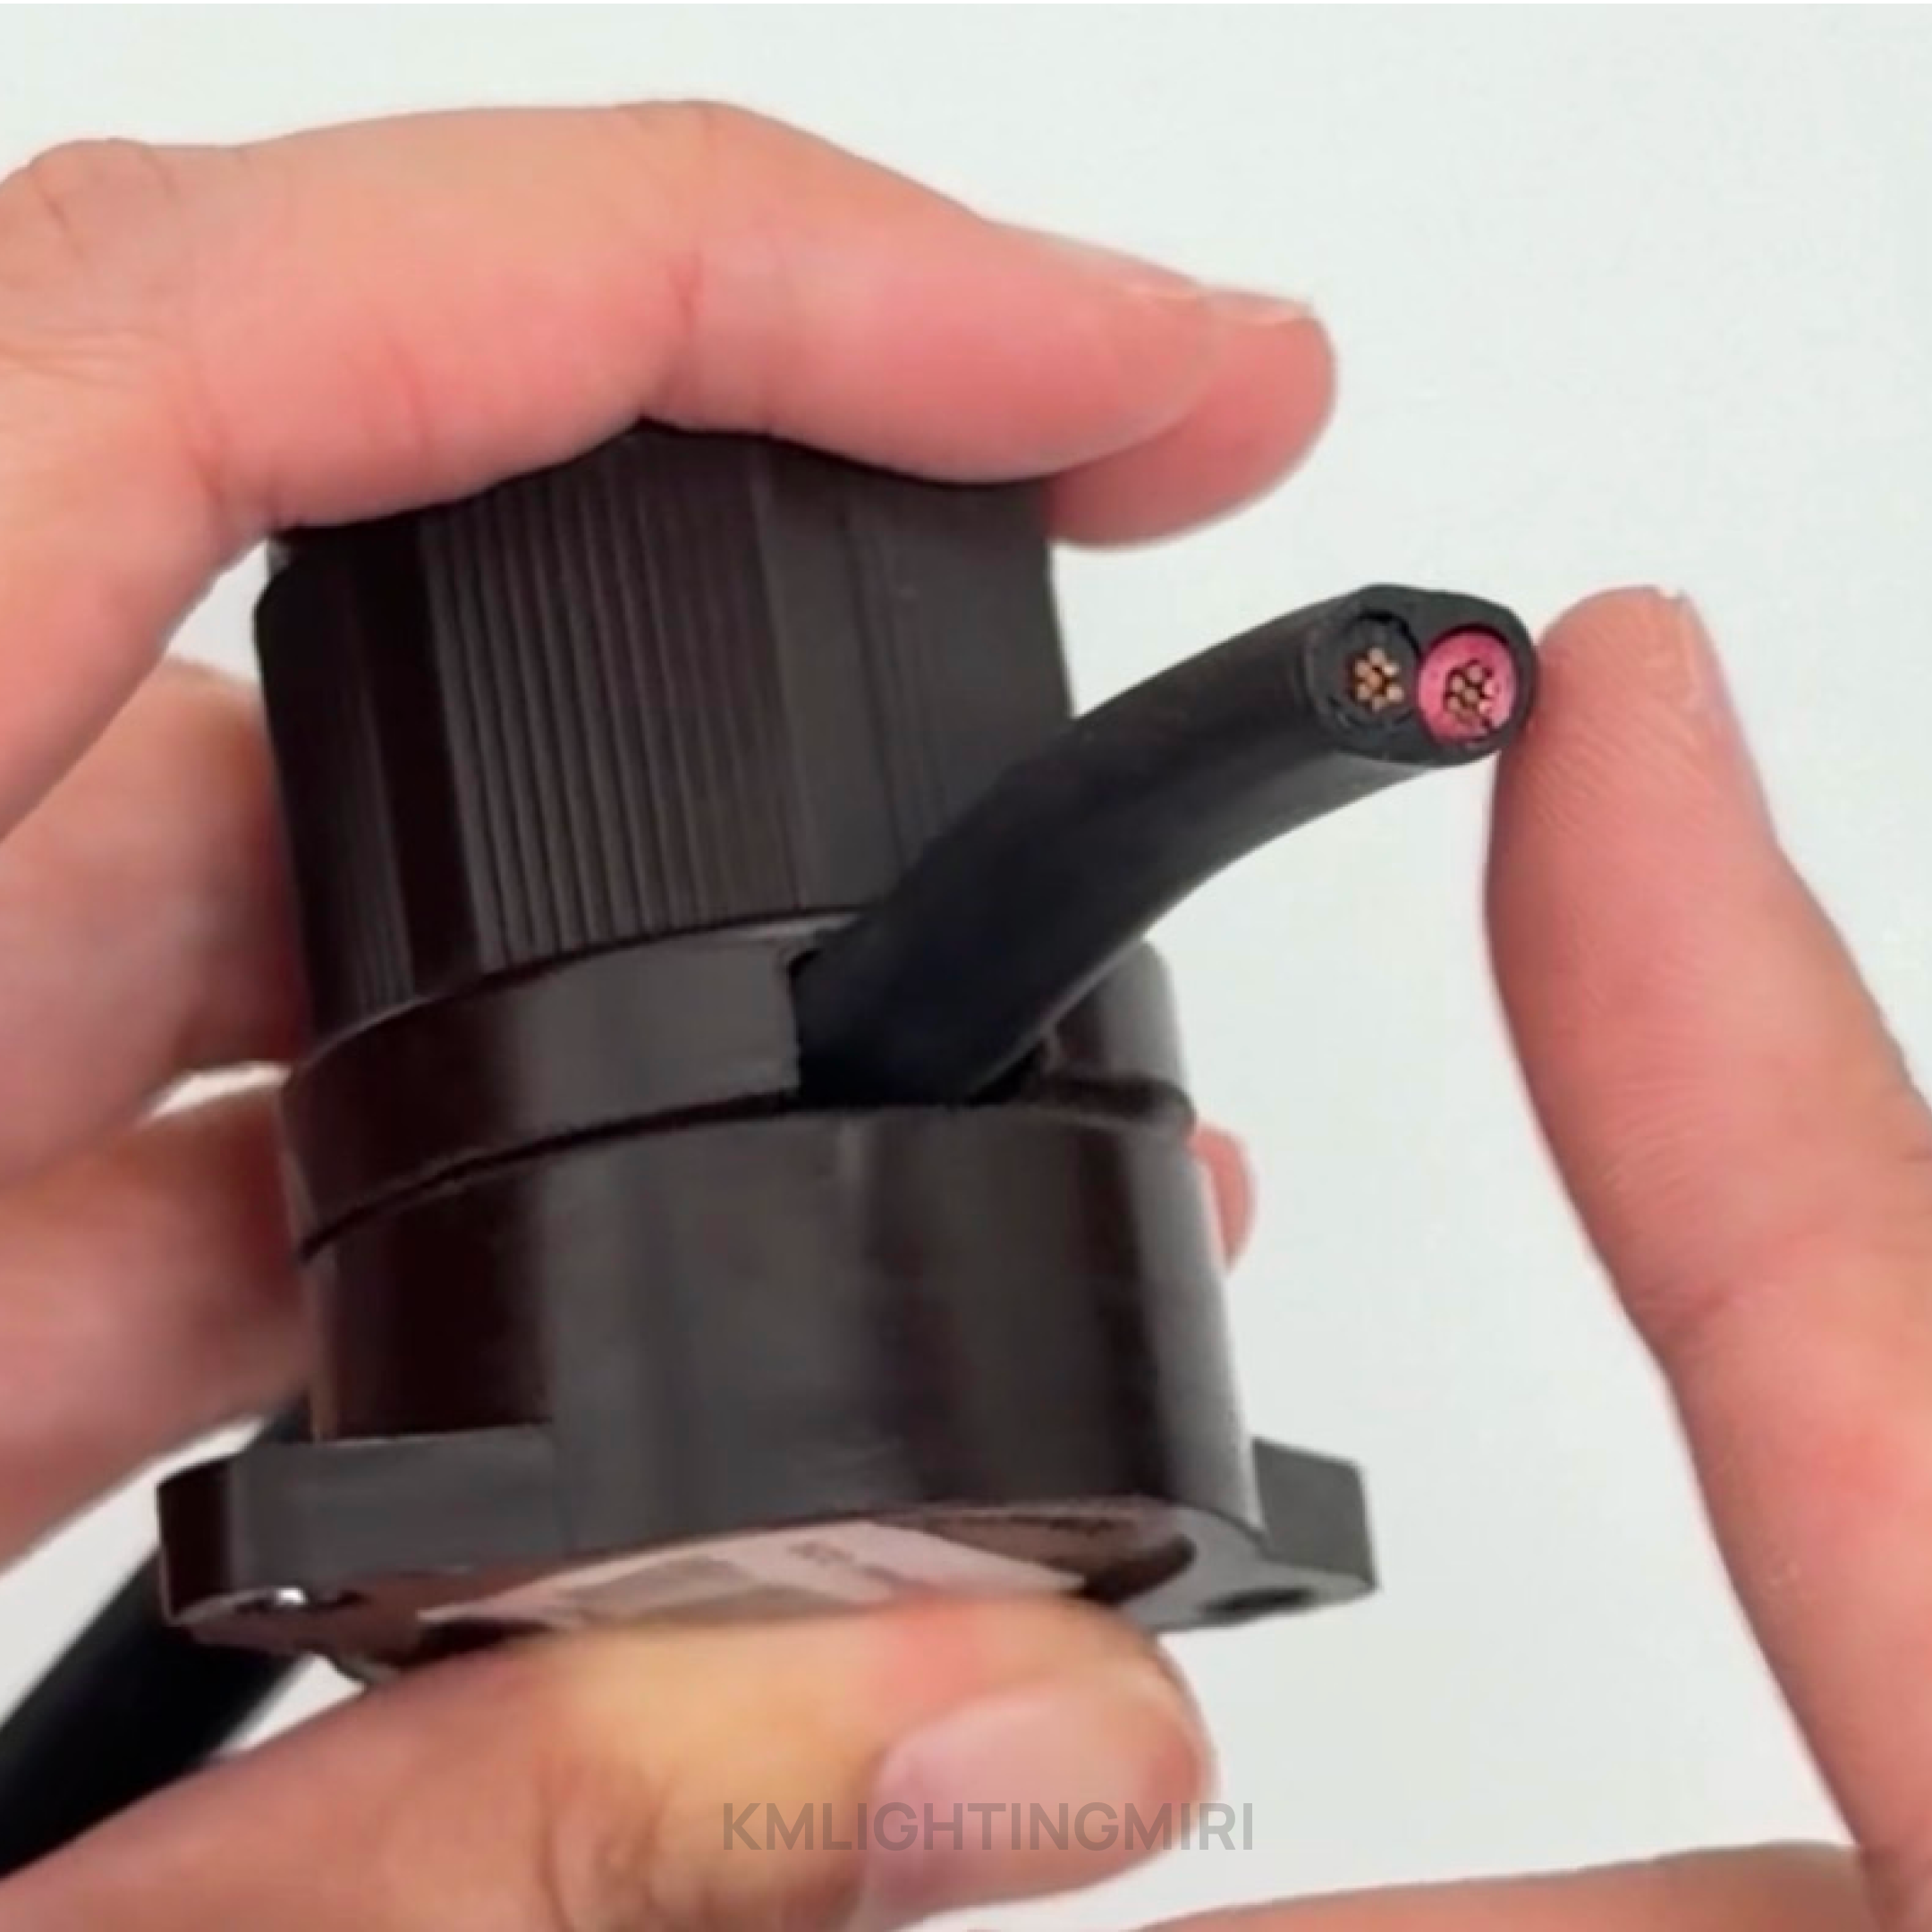
 5. Installing the BulbsNow the fun part. Take yourB22 Bulbs, align the pins with the slots on the holder,push in, andtwist clockwiseuntil they lock.
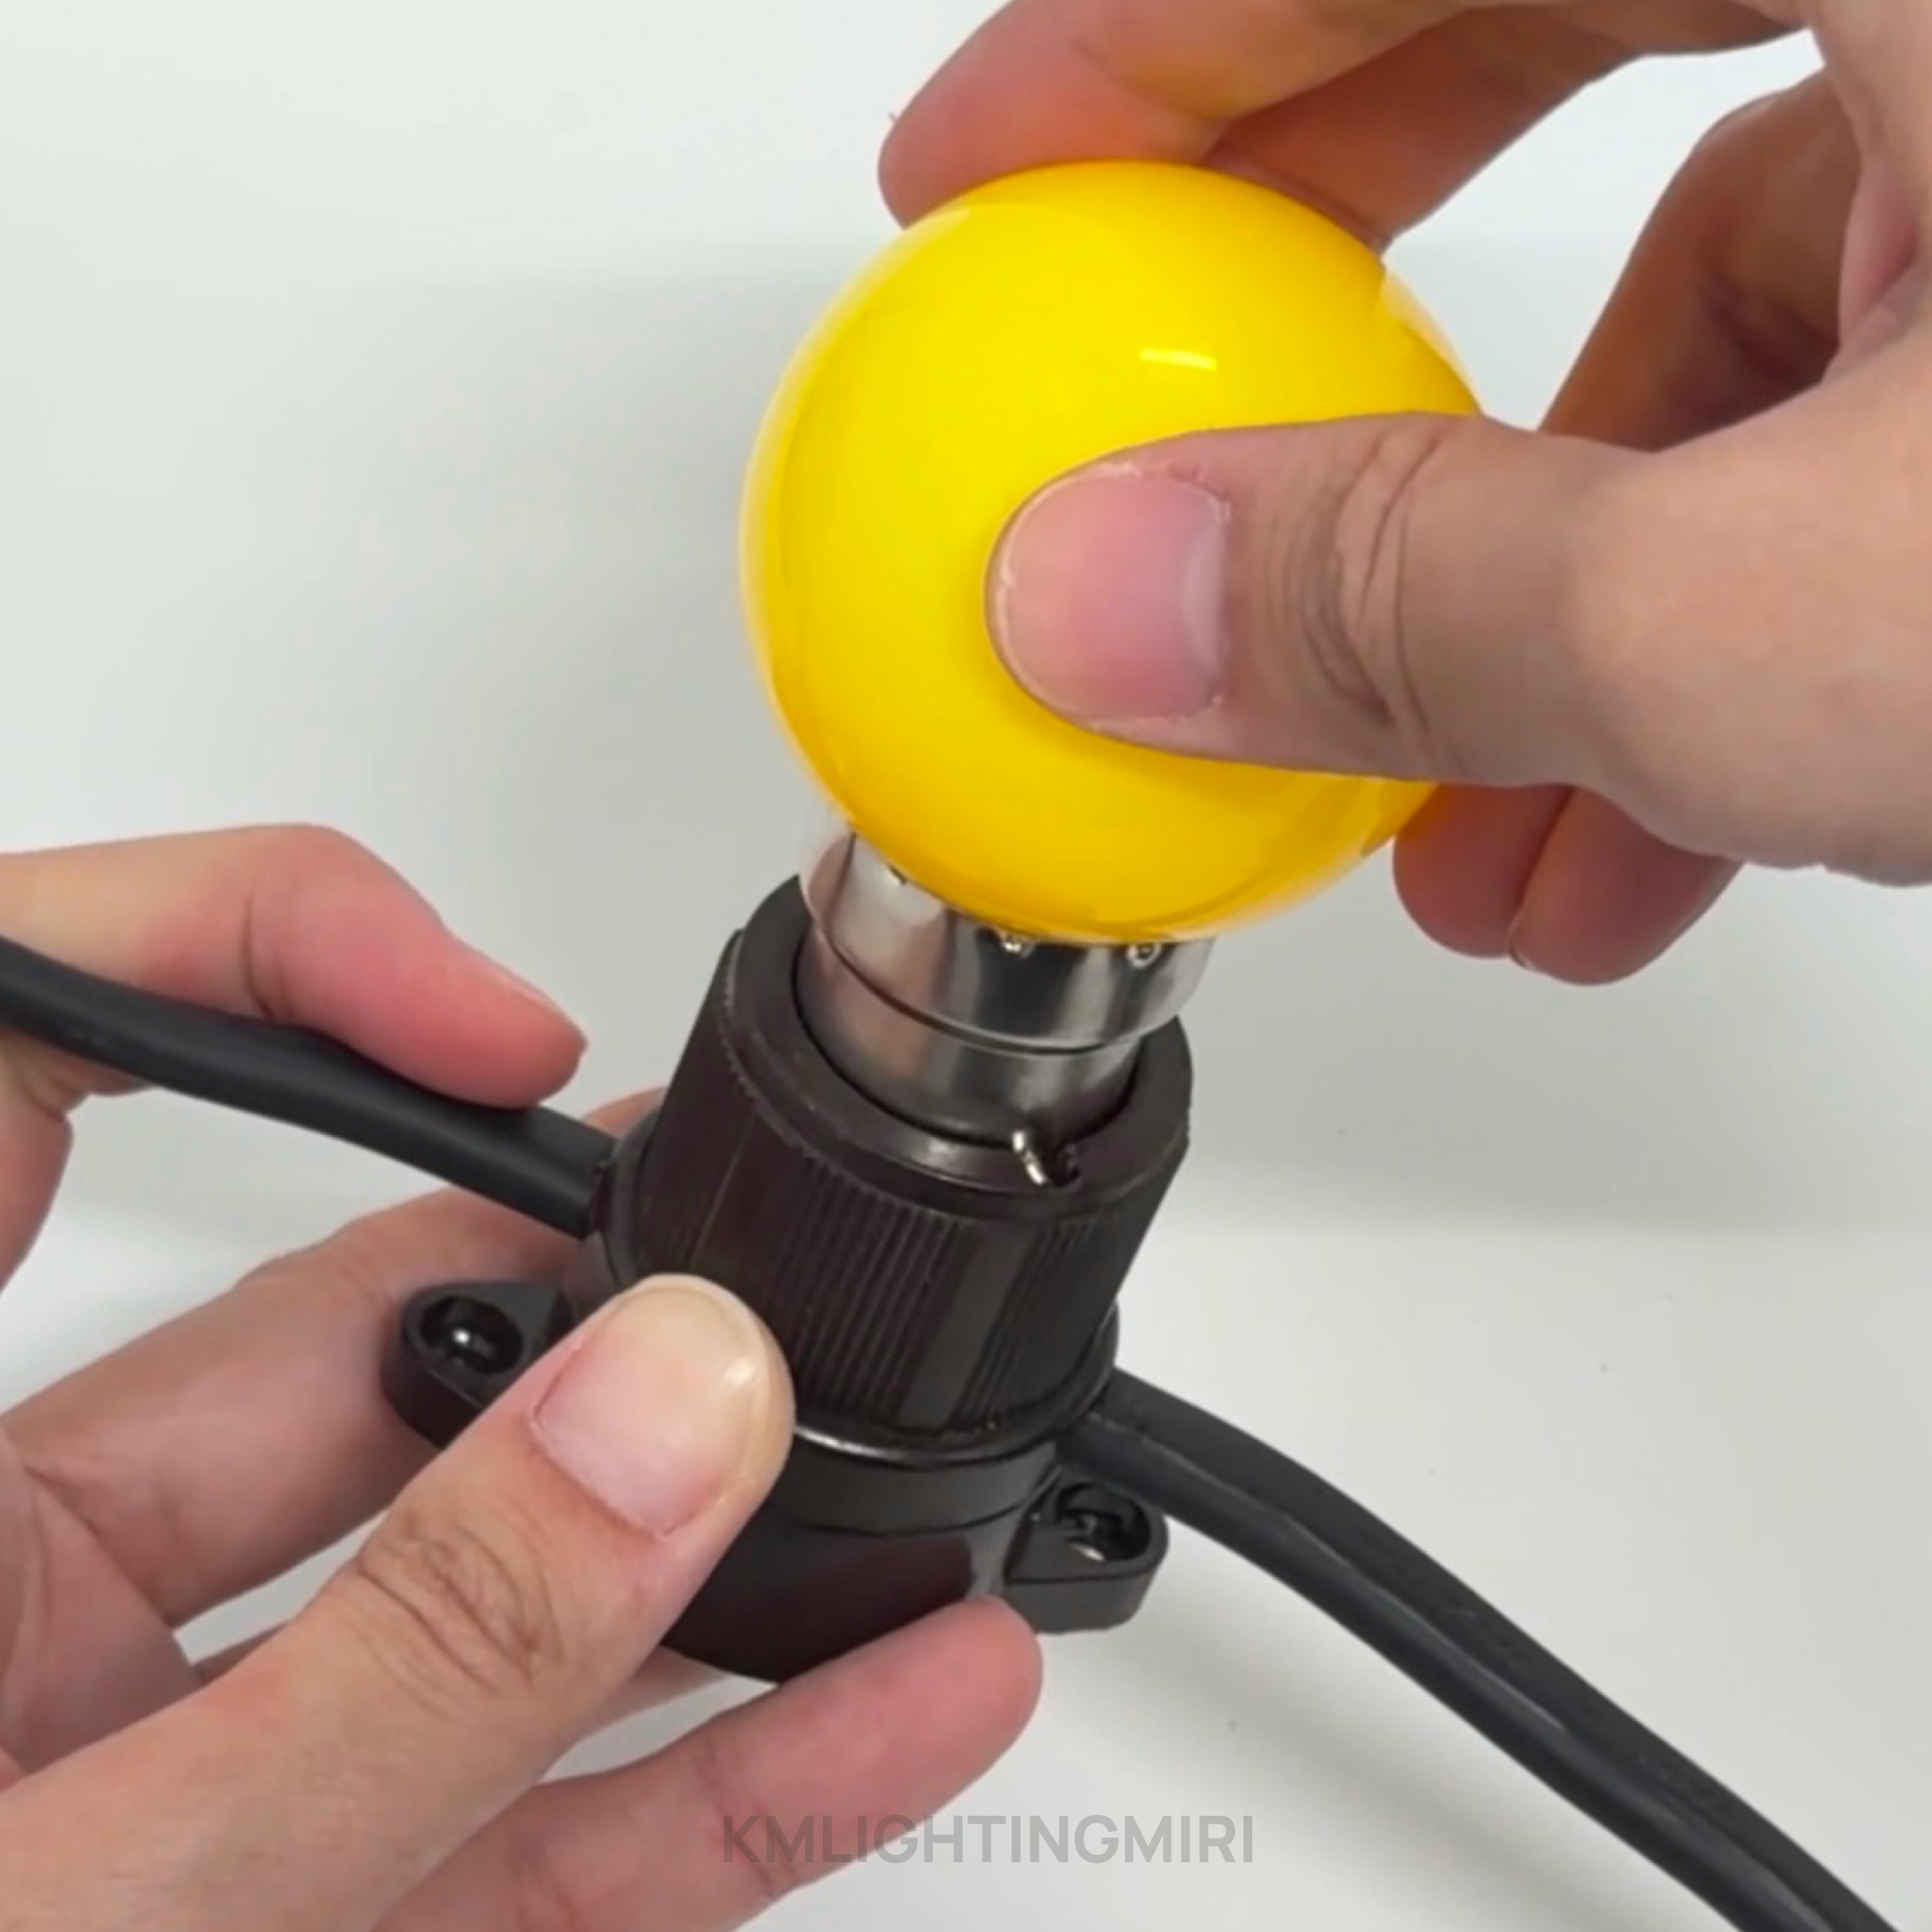 6. Hang and SecureNow, get your string up on the porch.For awnings:UseCable Ties (Zip Ties)For ceilings:UseCable Clips(the ones with the nail)Use whichever feels more convenient for your setup. This keeps the wire from sagging and prevents the wind from shaking your bulbs loose.And you‘re good to go! Test if every bulb is working before you hang the set up so it’ll be easier to swap the bulbs later!⚠️ Precautions & SafetyNever add holders or bulbs while the set is plugged in. Always assemble first, then power up.Do not hang heavy decorations (like heavy Ketupat cases) directly on the wire between bulbs; it can strain the "piercing" connection.❌ Common Mistakes to AvoidPulling Too Tight:Leaving no slack near the plug can cause the wires to pull out of the terminals over time.Skipping the Tape:Leaving the "dead end" of the wire exposed is dangerous. Even if it’s high up, moisture can cause a short circuit.✨ Extra TipsSmart Lighting:Plug your set into aSmart Plugor aTimer. You can set your lights to automatically turn on at 6:30 PM and off at midnight to save electricity!Spare Bulbs:Always buy 2 or 3 extra bulbs. If one fails, you can swap it in 5 seconds without a trip back to the store.Selamat Hari Raya and happy decorating from the KM Lighting team!